Guide

How to setup SCIM with Azure Active Directory

BlueTally lets you save time and headaches by automatically syncing employee entries with users from Azure Active Directory. Setup your integration in only a few steps:

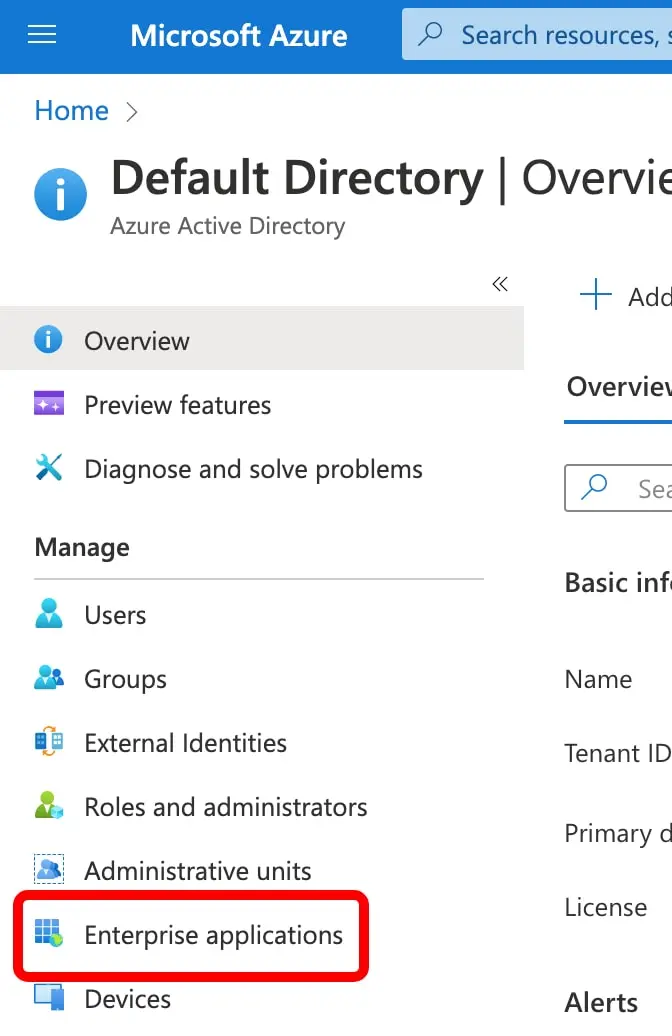
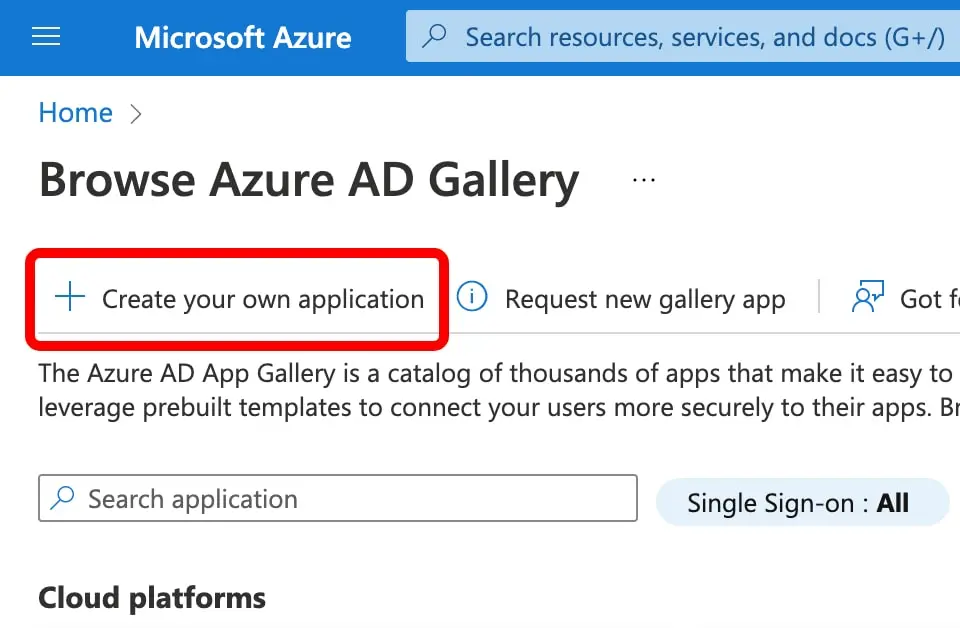
Login to your Azure account.

1
Click on "Azure Active Directory"
SCIM with Azure Active Directory Integration | BlueTally™
2
Click on "Enterprise applications" in the left menu bar
SCIM with Azure Active Directory Integration | BlueTally™
3
Click on "New application"
SCIM with Azure Active Directory Integration | BlueTally™
4
Click on "Create your own application"
SCIM with Azure Active Directory Integration | BlueTally™
5
Enter a name for the application (such as 'BlueTally SCIM'), select the "Integrate any other..." option and click "Create"
SCIM with Azure Active Directory Integration | BlueTally™
6
Scroll down and click on "3. Provision User Accounts"
SCIM with Azure Active Directory Integration | BlueTally™
7
Click on "Get started"
SCIM with Azure Active Directory Integration | BlueTally™
8
Change "Provisioning Mode" to Automatic, then enter the Tenant URL and Secret Token from your BlueTally account settings. Then click on "Test Connection" and "Save"
SCIM with Azure Active Directory Integration | BlueTally™
9
Now go back to the application overview and click on "Provisioning"
SCIM with Azure Active Directory Integration | BlueTally™
10
Click on "Provisioning"
SCIM with Azure Active Directory Integration | BlueTally™
11
Click on the "Mappings" tab, then on "Provision Azure Active Directory Users"
SCIM with Azure Active Directory Integration | BlueTally™
12
Click on "Show advanced options", then on "Edit attribute list for customappsso"
SCIM with Azure Active Directory Integration | BlueTally™
13
Add the following attribute to the list as a String type: "urn:ietf:params:scim:schemas:extension:enterprise:2.0:User:location", then click on "Save"
SCIM with Azure Active Directory Integration | BlueTally™
14
Click on "Add New Mapping"
SCIM with Azure Active Directory Integration | BlueTally™
15
Select which field in Azure AD you'd like to map to the employee's location field in BlueTally in the "Source attribute field" (in this example, we've selected "country"), then set the Target attribute to "urn:ietf:params:scim:schemas:extension:enterprise:2.0:User:location" and click on "Ok"
SCIM with Azure Active Directory Integration | BlueTally™
16
Click on "Save"
SCIM with Azure Active Directory Integration | BlueTally™
17
Now go back to the application overview and click on "Users and groups", then click on "Add user/group" to select all the AD users you want to synchronize as Employees to BlueTally
SCIM with Azure Active Directory Integration | BlueTally™
18
Once you've added all the users, click on "Provisioning", then click on "Start provisioning"
SCIM with Azure Active Directory Integration | BlueTally™

That's it! The synchronization will take place approx. every 40 minutes. Any changes you do to users in Active Directory will then be overwritten in BlueTally.

To sync the employee's location into BlueTally, you need to enable the Set employee location info from Identity Provider option in your BlueTally account settings under SCIM 2.0. If you'd like to sync the employee's department and manager into BlueTally as well, you can also enable the Set employee department info from Identity Provider option and Set employee manager info from Identity Provider options.

If you remove a user from Active Directory, they are marked as "Archived" in BlueTally, but not deleted - as they might still have assets checked out to them, and it might be useful to still keep their history.

If you have any questions regarding this integration, send us an email to support@bluetallyapp.com and we'll assist you with your setup!

You can also setup SSO with Azure AD, receive notifications directly to Microsoft Teams and Slack, integrate BlueTally with Intune, or into your existing workflows by using our powerful API.